Scented Candles 101: Care Secrets Every Candle Lover Needs to Know
Nikita JaisinghaniUnderstanding the Anatomy of a Candle
A candle is more than just melted wax; it’s a carefully crafted instrument of light and ambiance. At its heart lies the wick the soul of the flame. Made of braided cotton or other fibers, the wick dictates how the candle burns. Surrounding it is the wax, a blend of paraffin, soy, or beeswax, which fuels the flame by melting and vaporizing. The base provides stability, while fragrance oils release aromas when heated. Lastly, the container plays an essential role, influencing the burn rate and protecting surfaces. Each part works in harmony to create the flickering magic people cherish.
Why Proper Candle Care Matters
A well-loved candle holds more than just wax and a wick; it carries the promise of ambiance, warmth, and comfort. Neglecting proper care can cut this joy short, leading to uneven burns, wasted wax, and even safety hazards. Every flame tells a story, but an ill-tended candle may stutter with blackened smoke or pool its wax prematurely, leaving the tale unfinished.
Proper care ensures the candle burns smoothly and evenly. For instance, trimming the wick prevents excessive flickering and soot buildup. Even the simple act of letting a candle burn long enough to form a full melt pool can prevent tunneling. With the right attention, candlelight transforms into an enduring companion.
Trimming the Wick: A Simple But Crucial Step
Trimming a candle’s wick often feels like an afterthought, yet it holds the key to an even, long-lasting burn. A wick left too long can lead to excessive flickering, uneven melting, or soot buildup on glass containers.
To begin trimming, wait until the candle wax fully hardens after use. Use a wick trimmer or scissors to snip the wick to about 1/4 inch in length. This size ensures the flame burns steadily without overconsuming wax. Regular trimming also prevents the formation of “mushrooming,” a carbon buildup that compromises performance. By maintaining this simple habit, candles burn cleaner, brighter, and far longer.
The Importance of the First Burn
The very first burn of a candle sets the stage for its entire lifespan. When lighting a new candle, allowing it to burn long enough for the melted wax to reach the edges of the container is crucial. This typically takes about 1-3 hours, depending on the candle's size. Without this initial, even melt, a tunnel can form around the wick, leading to wasted wax and a shorter candle life.
A process known as "memory burn" occurs during this first burn—the wax "remembers" the boundaries it melted to and replicates this pattern on future burns. Ensuring an even pool of wax helps maintain proper burning, preserves fragrance distribution, and reduces excess residue.
Avoiding Tunneling for Even Wax Consumption
Tunneling often plagues candle enthusiasts, leaving an unburned ring of wax along the edges. To combat this, it’s essential to allow the candle to burn long enough on the first use. The wax pool should reach the edges of the container; otherwise, the memory ring created by uneven melting may trap future burns.
For larger candles, rotating them slightly while lit can help distribute heat more evenly. Keeping the wick trimmed to about ¼ inch prevents excessive flickering, which can unevenly heat one side of the candle. Additionally, investing in a candle warmer can help balance melting without relying solely on the flame.
Keeping Your Candle Away from Drafts
A candle’s steady flame can easily be disrupted by the invisible forces of airflow. Drafts from open windows, fans, or vents cause the flame to flicker unpredictably, which can lead to uneven burning and wasted wax. To shield the flame, one should place the candle in a sheltered spot, away from air currents. Choosing a stable, flat surface keeps it firmly grounded, ensuring safety and a balanced burn.
Maintaining draft-free lighting is especially important with tall candles or tapers, as their slender design exaggerates the effects. By simply repositioning, the candle's life extends remarkably, offering a calmer, more radiant glow.
Using Candle Accessories for Safer Burning
Candle accessories are more than just decorative they serve practical purposes to enhance safety and improve the burning experience. Tools like wick trimmers help maintain an even flame by keeping wick lengths at an ideal 1/4 inch. Long-burning candles need this upkeep to prevent excessive soot. Wick dippers, on the other hand, extinguish flames without the smoke or splatter.
A sturdy candle snuffer can eliminate fire hazards caused by blowing wax. Heatproof candle holders and trays reduce risks from hot wax spills. Moreover, hurricane lanterns shield flames from drafts, ensuring a stable burn. Proper accessory use reduces safety risks while maximizing candle enjoyment.
How to Safely Extinguish Your Candle
Blowing out a candle may seem simple, but it often leads to messy wax splatter or smoky odors. Instead, use a candle snuffer a small bell-shaped tool that gently smothers the flame without disturbing the wax pool.
Alternatively, a wick dipper can be used to push the wick into the melted wax, extinguishing the flame without smoke and priming it for the next burn. For those without tools, carefully place a metal spoon over the flame to slowly cut off its oxygen supply. Always wait for the wax to cool before handling the candle for safe storage.
Proper Storage to Preserve Candle Quality
Storing candles correctly can make a world of difference in preserving their quality and longevity. Exposure to sunlight fades vibrant colors and can soften the wax, causing warping or uneven surfaces. Over time, direct heat may compromise the fragrance. Instead, candles should rest in a cool, dry area, ensuring their original shape and scent remain intact.
Humidity, a silent culprit, can wreak havoc by causing discoloration or cracking. Wrapping candles in tissue paper or storing them in airtight containers offers protection against moisture. For pillar or tapered candles, laying them flat prevents bending over time. Proper storage safeguards both beauty and performance.
Cleaning and Reusing Candle Holders
When wax clings stubbornly to the inside of a beloved candle holder, there's no need to toss it aside. A simple remedy begins with freezing. By placing the holder in the freezer for a few hours, the wax hardens and contracts, making it easy to pop out with a gentle nudge of a butter knife. For residual wax, a soak in hot water melts away what’s left, allowing it to float to the surface for easy removal.
Once cleaned, reuse the holder creatively. It can house new candles, serve as a planter for succulents, or store small essentials like paperclips or jewelry.
Extending the Life of Your Candle with Multi-Wick Variants
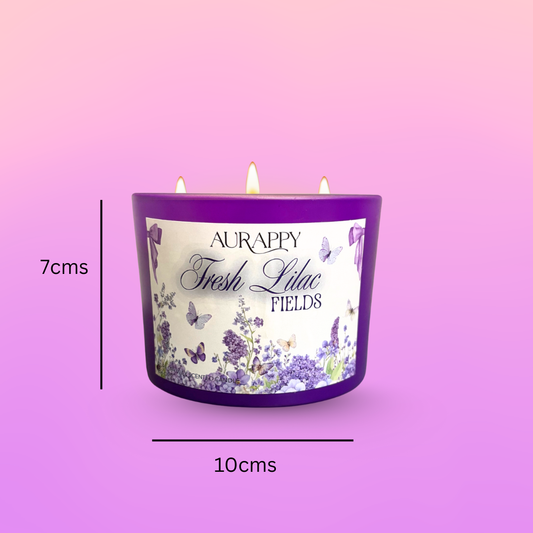
Choosing candles with multiple wicks can radically transform how they burn, making them more efficient and longer-lasting. Multi-wick candles distribute heat across the wax surface more evenly, preventing tunneling a common issue where the wax burns down the center and wastes the outer layers. This design promotes a steadier burn and helps ensure the entire surface melts consistently.
Each wick serves a purpose, working in harmony to create a wider pool of molten wax, which maximizes the fragrance throw and reduces the chances of unused residue. By opting for this thoughtful design, one can enjoy a brighter flame and get the most out of every inch of wax.
DIY Hacks to Revive Old or Uneven Candles
Some candles burn unevenly, leaving unsightly wax craters, while others get abandoned because their wicks disappear beneath melted wax. With a few simple DIY tricks, even tired, lopsided candles can spark new life.
-
Level uneven surfaces: Start by softening the candle's surface with a hairdryer set to low heat. Once pliable, trim the excess wax around the edges and gently smooth it flat using a spatula or butter knife.
-
Fix buried wicks: If melted wax has swallowed a wick, remove the excess wax with a spoon or melt it away with a dryer until the wick reappears. Center and straighten it carefully.
-
Recycle leftover wax: Collect scraps from other candles and melt them in a heat-safe container. Pour the mixture into an empty jar. Add a new wick to craft a revived candle blend.
These hacks will rescue candles while adding a touch of creativity to the process!
Common Candle Mistakes and How to Avoid Them
Some candle lovers unknowingly cut their flames short by falling into common pitfalls. Forgetting to trim the wick often leads to excessive soot and uneven burning. A wick should always be trimmed to about 1/4 inch before lighting to ensure a clean flame. Others make the mistake of not letting the wax pool fully during the first burn, which creates a dreaded "tunneling" effect. Patience with the initial burn guarantees a longer candle lifespan.
Over-burn time is another error; wax can overheat and deform if left burning past the recommended 3–4 hours.
Sustainable Practices for Candle Enthusiasts
Candle lovers can embrace sustainability by making conscious choices in their candle care rituals. Using candles made from eco-friendly materials such as soy wax, beeswax, or coconut wax helps reduce environmental impact. Opting for wicks made from natural fibers like cotton or wood ensures cleaner burning.
To further practice sustainability, individuals can reuse or recycle candle jars. Empty jars can double as storage containers or decorative accents. When repurposing isn’t feasible, ensuring jars are disposed of in glass recycling bins minimizes waste.


